#laravel 5 configure email
Explore tagged Tumblr posts
Visit Tumblr Blog
Explore Tumblr blogs with no restrictions, modern design and the best experience.
Last Seen Tumblr Blogs


Fun Fact
In 2020, Tumblr had 29.4 million users in the US.
Text
TicketGo Nulled Script 4.2.2

Download TicketGo Nulled Script for Free – The Ultimate Support Ticket System If you're looking for a reliable, efficient, and feature-rich support ticket management solution, the TicketGo Nulled Script is the perfect choice for your business or project. Whether you're running a digital agency, a tech startup, or an eCommerce store, TicketGo empowers you to manage customer support like a pro—without spending a dime. Now available for free download, this nulled script opens the door to premium features without the premium price tag. What is TicketGo Nulled Script? The TicketGo Nulled Script is a robust, fully-featured PHP-based support ticket system designed to streamline and automate your customer service workflows. It enables businesses to handle support queries, assign agents, prioritize tickets, and track progress through an intuitive dashboard. Best of all, you can download this premium-grade tool for free and integrate it easily into your existing system. Why Choose TicketGo Nulled Script? Support ticket systems are crucial for any service-based business. With the TicketGo Nulled Script, you get a polished, powerful backend with clean code, easy installation, and rich customization options. It’s a complete support system solution at zero cost—perfect for startups and developers who need professional tools without breaking the bank. Technical Specifications Language: PHP Database: MySQL Framework: Laravel Responsive Design: Fully mobile-optimized License: Nulled (No license required) Key Features & Benefits 1. Advanced Ticket Management Organize and manage support tickets with ease using the integrated dashboard. The system supports ticket categorization, priority tagging, and real-time updates to ensure efficient resolution. 2. Multi-Agent Support Assign different agents to specific tickets or departments. With the TicketGo Nulled Script, collaboration is seamless, boosting your team’s productivity. 3. Customizable Email Notifications Keep your users informed with automatic email alerts for ticket updates, agent responses, and ticket closures. You can customize templates to match your brand voice. 4. User-Friendly Interface The intuitive, clean design ensures a smooth user experience for both customers and agents. No steep learning curve—just plug and play. 5. Analytics & Reporting Gain insight into your support operations with built-in analytics. Monitor agent performance, ticket trends, and response times directly from the dashboard. Common Use Cases Freelancers: Manage client queries and feedback efficiently. Startups: Deliver professional-grade customer support from day one. eCommerce Platforms: Handle order-related issues and customer complaints systematically. Software Developers: Track bugs and feature requests from users. How to Install TicketGo Nulled Script Download the TicketGo Nulled Script zip file from our website. Extract the files and upload them to your server directory using FTP or cPanel. Create a MySQL database and import the included SQL file. Configure your .env file with the correct database credentials. Access your domain in the browser to complete the setup wizard. Frequently Asked Questions (FAQs) Is TicketGo Nulled Script safe to use? Yes, the version provided has been tested for malware and backdoors. However, it's always recommended to scan any file before installation. Do I need a license to use TicketGo? No. The TicketGo Nulled Script available on our platform is fully nulled and does not require any license for use. Can I use it for commercial projects? Absolutely! This script is ideal for both personal and commercial projects. Just install, configure, and start managing tickets professionally. Where can I download other helpful tools? We offer a wide range of nulled plugins to support your development and design needs. Looking for top-tier WordPress security? Check out the powerful iThemes Security Pro NULLED for complete protection of your WordPress site—absolutely free!
Conclusion With the TicketGo , you can build a high-functioning, client-friendly support system without the high costs. It’s the ideal solution for anyone seeking a streamlined, efficient way to handle support tickets while enjoying full control over the features and appearance. Download now and elevate your support game—no licenses, no subscriptions, just pure performance.
0 notes
Text
Exploring Laravel’s Ecosystem: Top Tools and Packages You Should Use

Laravel has become one of the most popular PHP frameworks due to its elegant syntax, robust features, and a thriving ecosystem. If you're working with Laravel or considering it for your next project, exploring its extensive range of tools and packages is crucial to optimizing your development process. A Laravel Development Company can help you unlock the full potential of Laravel by implementing these tools effectively. Whether you're building a small website or a complex web application, understanding the tools available within Laravel's ecosystem can significantly improve both the development speed and the performance of your project.
The Laravel Ecosystem: A Treasure Trove of Tools
Laravel is not just a framework; it’s an entire ecosystem with various tools and packages that simplify everything from authentication to deployment. Laravel’s ecosystem is known for its simplicity, scalability, and ability to integrate with a variety of technologies. It’s designed to streamline development, making it easier for developers to build web applications quickly and efficiently.
One of the standout features of Laravel is Laravel Forge, a tool that simplifies server management, allowing developers to deploy applications with ease. Forge provides a robust solution for provisioning servers, configuring SSL, and monitoring server health. This tool eliminates the hassle of manual server management, enabling developers to focus on writing clean and efficient code.
Top Laravel Tools and Packages to Boost Your Productivity
Here are some essential tools and packages that you should consider when working with Laravel:
1. Laravel Nova
Nova is a beautifully designed administration panel for Laravel applications. It provides a clean and intuitive interface for managing the data in your application. Nova allows you to create custom dashboards, manage resources, and build complex relationships between different parts of your app.
It is ideal for Laravel developers who want to create powerful and customized admin panels without reinventing the wheel. As a package, Nova offers a flexible and highly configurable UI that can be tailored to fit your business needs.
2. Laravel Echo
For applications that require real-time features like notifications, chat, or activity feeds, Laravel Echo is an essential tool. Echo makes it easy to broadcast events from your application to clients in real time. It integrates seamlessly with WebSockets, so you can push updates to users without requiring them to refresh the page.
If your app demands live updates, whether for a messaging system, live notifications, or any other feature requiring real-time data, Echo is a must-have tool in your Laravel toolkit.
3. Laravel Passport
OAuth2 authentication is a common feature for many modern applications, especially those that require API-based access. Laravel Passport is a full OAuth2 server implementation for Laravel, providing a secure and straightforward way to manage API authentication.
Passport makes it simple to issue access tokens for your API and protect routes with OAuth2 security. It’s an essential package for developers building large-scale applications with API-driven architectures.
4. Laravel Horizon
Managing queues and jobs is a significant part of building scalable applications. Laravel Horizon is a powerful queue manager that provides a beautiful dashboard for monitoring and managing your queues. With Horizon, you can track job throughput, failures, and other crucial metrics that help ensure your queue system runs smoothly.
Horizon is particularly useful for applications that need to handle a high volume of tasks or background processes, such as processing payments or sending emails.
5. Laravel Mix
When it comes to asset compilation, Laravel Mix simplifies front-end workflow. Mix provides a clean API for defining Webpack build steps for your Laravel application, making it easier to manage CSS, JavaScript, and other assets.
With its seamless integration into Laravel, Mix allows you to compile and minify your assets with ease, helping you improve the performance and user experience of your application.
6. Spatie Packages
Spatie is a renowned company within the Laravel community that has created a wide array of useful packages. Some of their most popular packages include Laravel Permission for role-based access control, Laravel Media Library for handling file uploads, and Laravel Activitylog for tracking user activity.
Spatie’s tools are known for their reliability and ease of use, making them excellent choices for developers who want to extend Laravel’s functionality without reinventing the wheel.
7. Laravel Scout
If your application needs full-text search capabilities, Laravel Scout is the go-to solution. Scout provides a simple, driver-based solution for adding full-text search to your models. It works with several popular search engines like Algolia and TNTSearch.
Using Scout, you can easily implement robust search functionality in your Laravel application without having to worry about the complexities of managing search indexes and queries.
Considering Mobile App Development? Don’t Forget the Cost
If you're planning to take your Laravel web application to the mobile platform, integrating a mobile app into your Laravel project is becoming increasingly popular. However, before diving into mobile app development, it's important to consider the mobile app cost calculator to understand the expenses involved.
Building a mobile app can range from a few thousand dollars to hundreds of thousands, depending on the features, platforms (iOS/Android), and the complexity of the app. A mobile app cost calculator can give you a rough estimate of the costs based on your desired features and functionalities, helping you make informed decisions about your project’s budget and scope.
If you’re unsure of how to proceed with your Laravel app and mobile development strategy, it’s always a good idea to consult a Laravel Development Company for expert advice and support.
If you're interested in exploring the benefits of Laravel development services for your business, we encourage you to book an appointment with our team of experts. Book an Appointment
Conclusion
The Laravel ecosystem is rich with tools and packages designed to streamline development, enhance functionality, and improve the overall user experience. From real-time events with Laravel Echo to managing queues with Laravel Horizon, these tools can help you build robust applications more efficiently.
If you’re looking for expert guidance or need help with your next project, consider leveraging Laravel App Development Services to ensure you’re utilizing the full power of the Laravel ecosystem. By working with professionals, you can save time and focus on what matters most—creating outstanding web applications.
0 notes
Text
Fixing Insufficient Logging and Monitoring in Laravel
Insufficient logging and monitoring is a common vulnerability that can lead to missed or delayed detection of security incidents in web applications. In this blog, we’ll explore how Laravel developers can mitigate this issue with practical coding examples and introduce a free Website Security checker tool to evaluate your website's vulnerabilities.

What is Insufficient Logging and Monitoring?
Insufficient logging and monitoring occur when an application fails to:
Record critical events like authentication attempts, permission changes, or system errors.
Generate alerts for unusual activities.
Monitor logs for anomalies or breaches.
Without proper logging and monitoring, organizations may remain unaware of attacks, compromising their ability to respond to and mitigate potential damage.
Impact of Insufficient Logging and Monitoring
Delayed Incident Response: Attack detection is slower, giving attackers more time to exploit vulnerabilities.
Compliance Issues: Many regulations (e.g., GDPR, HIPAA) mandate robust monitoring systems.
Reputation Damage: Customers lose trust after unreported breaches.
How Laravel Handles Logging
Laravel uses the powerful Monolog library for logging, supporting multiple log handlers such as files, databases, or external tools like Slack. Laravel’s configuration files for logging are stored in:
config/logging.php
Steps to Mitigate Insufficient Logging and Monitoring
Enable Detailed Logging Configure logging levels based on your environment. Laravel supports levels like debug, info, notice, warning, error, etc. Example: Setting Up Logging in Laravel In the config/logging.php file:
return [ 'default' => env('LOG_CHANNEL', 'stack'), 'channels' => [ 'stack' => [ 'driver' => 'stack', 'channels' => ['daily'], ], 'daily' => [ 'driver' => 'daily', 'path' => storage_path('logs/laravel.log'), 'level' => 'debug', // Adjust as needed 'days' => 14, ], ], ];
This setup logs events daily and retains logs for 14 days.
Log Critical Events Ensure important actions are logged. For example, log login attempts and failed logins:
use Illuminate\Support\Facades\Log; // Successful Login Log::info('User logged in', ['user_id' => auth()->id()]); // Failed Login Log::warning('Failed login attempt', ['email' => request('email')]);
Monitor Logs and Generate Alerts Use tools like Laravel Telescope to monitor logs. Install Telescope via Composer:
composer require laravel/telescope
Publish its assets:
php artisan telescope:install php artisan migrate
Enable Telescope in production by modifying the telescope.php configuration file.
Using Free Tools for Security Checks
To ensure your Laravel application’s logging and monitoring setup is effective, it’s crucial to identify potential vulnerabilities. Our Website Security Scanner can help.

Screenshot of the free tools webpage where you can access security assessment tools.
Real-World Example: Logging Suspicious Activity
Here’s how to log suspicious activity in Laravel:
use Illuminate\Support\Facades\Log; // Log suspicious activity function detectSuspiciousActivity($user) { if ($user->login_attempts > 5) { Log::alert('Suspicious login activity detected', [ 'user_id' => $user->id, 'email' => $user->email, ]); } }
Sample Vulnerability Report
Using our tool, you can generate a detailed vulnerability assessment report, highlighting areas like insufficient logging.

An example of a vulnerability assessment report generated with our free tool provides insights into possible vulnerabilities.
Conclusion
Insufficient logging and monitoring are critical vulnerabilities that developers must address to ensure their Laravel applications remain secure. By implementing proper logging, monitoring logs, and using tools like Laravel Telescope, you can mitigate risks effectively.
Don’t wait—try our free Website Security Checker tool today to identify vulnerabilities in your application and improve your security posture!
#cyber security#cybersecurity#data security#pentesting#security#the security breach show#laravel#php#logging#monitoring#sql
1 note
·
View note
Text
How to Optimize Laravel Applications for Performance

Laravel is one of the most popular PHP frameworks, known for its elegant syntax and robust features. However, like any web application, Laravel projects can experience performance bottlenecks if not optimized properly. As a Laravel developer, understanding how to optimize your application is crucial to delivering fast, reliable, and scalable solutions. Here are some essential strategies to enhance the performance of your Laravel applications.
1. Optimize Database Queries
Efficient database interaction is vital for application performance. As a Laravel developer, you can optimize your queries by:
Eager Loading: Use Eager Loading to prevent the N+1 query problem by loading all necessary related models with a single query.
Query Caching: Implement query caching for frequently accessed data to reduce the load on your database.
Indexes: Ensure that your database tables are properly indexed. Indexes can drastically speed up query performance, especially on large datasets.
2. Leverage Laravel’s Built-in Caching
Laravel provides a powerful caching system that can significantly reduce the time taken to retrieve frequently accessed data. As a Laravel developer, you should:
Route Caching: Cache your routes for faster route resolution, particularly in large applications.
View Caching: Cache compiled views to avoid recompiling Blade templates every time they are accessed.
Application Caching: Use Laravel’s application cache to store expensive computations or database queries.
3. Optimize Autoloading
Autoloading is convenient but can slow down your application if not managed properly. Here’s how you can optimize autoloading:
Classmap Optimization: Use composer dump-autoload -o to optimize the autoloader by creating a static map of all classes in your application.
Remove Unused Service Providers: Only load the service providers that your application needs. Disable or remove unnecessary ones to reduce overhead.
4. Use Queues for Time-Consuming Tasks
As a Laravel developer, offloading time-consuming tasks to background jobs is a smart way to keep your application responsive. Tasks like sending emails, processing file uploads, or generating reports can be handled asynchronously using Laravel Queues. This not only improves the user experience but also reduces the load on your server.
5. Optimize Middleware and Configurations
Middleware is a powerful feature in Laravel but can introduce latency if not used correctly. Optimize middleware by:
Prioritizing and Grouping Middleware: Group middleware that is frequently used together to reduce the overhead of loading them individually.
Minimize Middleware Usage: Only apply middleware where it is absolutely necessary.
Additionally, ensure that your configurations are optimized. Use Laravel’s built-in configuration caching to load all configuration files into a single file for faster access.
6. Minimize Asset Loading
Front-end performance is just as important as back-end optimization. As a Laravel developer, you can:
Minify CSS and JavaScript: Minify and combine your CSS and JavaScript files to reduce the number of HTTP requests and file sizes.
Use Content Delivery Networks (CDNs): Serve static assets like images, CSS, and JavaScript files from a CDN to reduce server load and improve load times.
7. Monitor and Analyze Performance
Finally, continuous monitoring and analysis are key to maintaining performance. Use tools like Laravel Telescope, Blackfire, or New Relic to monitor application performance and identify bottlenecks. Regularly analyze your application’s performance metrics to ensure it remains optimized.
Conclusion
Optimizing a Laravel application for performance is a multi-faceted task that requires attention to both the server-side and client-side aspects of your application. By following these strategies, a Laravel developer can ensure that their applications run efficiently, providing a seamless user experience. Remember, continuous optimization is key to keeping your Laravel applications performing at their best.
0 notes
Text
TOP 10 ADVANTAGES OF USING LARAVEL FRAMEWORK

Laravel is one of the most popular frameworks that offer custom software development. This framework has got the highest stars on Github, which mentions that more than 56000 developers are currently using it across the globe for responsive web development. Based on Github’s report, it’s quite evident that you have ample choices if you want to hire Laravel developer for your online presence.
However, before choosing any framework, it’s essential that you know its pros and cons well. Otherwise, you won’t be able to make the best out of your project. Therefore, we are sharing the top ten advantages of using the Laravel framework for custom software development. Based on these advantages, you can create a plan that aligns with your business goals and your industry niche by discussing it with your Laravel development company
Before we explain the advantages of the Laravel framework to you, here is a snippet of the Laravel framework and its possibilities
What is Laravel and What are its Uses?
Laravel is a free and open-source PHP framework based on MVC architecture that offers effortless web and app development. Taylor Otwell founded this framework, which got released in June 2011. The latest version of the framework is 8.16.1. Laravel is suitable for developing complex and large websites.
Though Laravel is a bit complex as compared to the other PHP frameworks, it is the most suitable one when it comes to developing extremely powerful web applications. Laravel provides expressive tutorials (Laracasts), documentations and boasts a huge community to assist the developers worldwide.
Some of the vital features of the Laravel framework are Bundles, Query Builder, Reverse Routing, Eloquent ORM, Application Logic, IoC, Migrations, Class Auto Loading, Blade Templating Engine, Automatic Pagination and more. The ORM and routing allow one to develop modern applications with sheer perfection.
The Top 10 Advantages of Using Laravel Framework:
1. Fixing Security Vulnerabilities: Be it any web application, the development phase causes some sort of technical glitch that can be a real threat to security vulnerabilities. Some of the most vulnerable elements are cross-site scripting, SQL injection and site request forgery. Laravel can help you secure your web app with its fanatically guarded codebase.
2. Mail Service Integration: Today, it’s essential for businesses to send service emails to the customers after every event, be it registration or purchase. Laravel makes it better for the SwiftMailer library with its simple, clean API to perform the task. Moreover, Laravel can provide drivers for Mailgun, SMTP, SparkPost and a lot more platforms.
3. Authorization Process: For every app, authorization of the users is a common aspect, which makes the owners sure that the users are authentic people. It helps them to secure their purchase options from unauthorised buyers. Laravel’s authentication process is quite advanced and yet simple, which anyone can implement and use with ease.
4. Faster Application: Recent studies show that users prefer fast-loadable and high-responsive apps on every platform. A slow app can be the reason for the loss of revenue for any business and hence, Laravel can provide the best solution. It comes with in-memory caches such as APC and Memcached and also ensures multiple cache configurations.
5. Built with Testing: For any Laravel development company, the process of testing apps is like a cakewalk. Laravel comes with in-built testing features with PHPUnit and hence it offers speedy and error-free testing every time. There are convenient helper methods in this framework that allow expressive testing of complex large apps.
6. Configuration Error: User experience is partially dependent upon the way an app can handle errors. In many apps, users click the Submit button and then errors are identified. It helps the users to understand which steps are taken wrong and should be corrected. For Laravel, error and exception handling are two of its best features.
7. Queue Service: When an app gets more traffic, it has to handle an excessive number of message requests per second. Now, if the app is developed with an ordinary framework, there are chances of data loss or higher expense. With the unified API system of Laravel, there is no reason to worry. The process of sending messages and emails speeds up in this framework.
8. URL Routing Configuration: The users usually use URL links to see something specific such as the service page or a contact form. If the web app doesn’t have URL routing, it won’t be able to show that exact page and instead will show an error. Laravel uses app/Http/routes.php files to identify URL routes and respond quickly to users’ requests.
9. Separation of Codes: If you hire Laravel developer for your business, you will get to know about this advantage in detail. Laravel is an MVC framework, which can separate business logic code from presentation code. As a result, Html Layout Designers do not need to interact with developers while changing the UI/UX of a web page.
10. Task Scheduling: Every web app requires a task scheduling system to track and manage all its ongoing tasks. Earlier, developers had to generate Cron entries to schedule tasks each time but today, Laravel allows the developers to command schedule tasks within the framework and generate a single Cron entry in the server.
If you are planning for a full-stack Laravel app development, therefore, looking for a Laravel development company to partner with, look no further than us. We, Idiosys Technologies, are one of the most eminent web and app development companies providing a plethora of services including Laravel app development. Headquartered in Kolkata, we basically provide web development, app development and marketing solutions to a huge number of multi-national and start-up companies from India, Canada, the USA, Germany, Australia, Brazil, the UK and Panama. Our expertise and long experience in the industry has made us one of the top web development and IT companies in India. You can hire the most efficient Laravel developers’ team and Laravel framework experts from our company to boost your online presence. So, why wait anymore? Contact us today to know the best deals we can offer you.
0 notes
Photo

How to setup email configuration and send email in Laravel 5 Learn how to configure email in Laravel and send an email to the desired recipient. You will learn how to define mail settings in Laravel .env file which you can then use to define settings in your mail.php configuration file using the env() Laravel method. source
#configure laravel email settings#define...#How-to (Website Category)#laravel#laravel 5#laravel 5 configure email#laravel 5 send email#laravel 5 send mail
0 notes
Text
Top 5 Backend Frameworks for Web App Development in 2023

In the world of web app development, choosing the right backend framework is crucial for building robust, scalable, and efficient applications. As technology evolves, new frameworks emerge, offering developers powerful tools and capabilities. In this blog post, as recommended by UmanoLogic, a leading software development company.
Express.js:
Express.js has established itself as a dominant force in backend development. Known for its simplicity, flexibility, and minimalistic approach, Express.js offers a lightweight framework that allows developers to build fast and scalable web applications.
Django:
Django, a high-level Python web framework, continues to be a top choice for web app development. With its batteries-included philosophy, Django provides a robust set of tools and libraries for handling common web development tasks, including authentication, database management, and URL routing.
Ruby on Rails:
Ruby on Rails, often referred to as Rails, is a popular backend framework known for its simplicity and developer-friendly nature. Built on the Ruby programming language, Rails follows the convention-over-configuration principle, reducing the need for repetitive coding tasks. Rails' extensive collection of gems, rapid prototyping capabilities, and emphasis on code readability make it a preferred choice for startups and small to medium-sized projects.
Laravel:
Laravel, a PHP web application framework, has gained significant traction in recent years. Offering an elegant syntax and a wide range of features, Laravel simplifies the development process and speeds up project delivery.
ASP.NET Core:
ASP.NET Core, developed by Microsoft, is a versatile, open-source backend framework. With its cross-platform compatibility and high-performance capabilities, ASP.NET Core allows developers to build modern web applications using C# or F#.
Conclusion:
As web app development continues to evolve, choosing the right backend framework becomes increasingly critical. By selecting the most suitable framework for your project, you can ensure a solid foundation for success in the dynamic world of web app development. Partnering with UmanoLogic, a trusted Web App development company, can further enhance your journey towards building exceptional web applications.
For more details !!!
Email: [email protected] us : https://www.umanologic.ca
#web development#web development company in edmonton#dedicated web developers in ca#web app development service
0 notes
Text
Laravel 9 Send SMS Notification to Mobile Phone Tutorial

This comprehensive guide will show you how to use the Vonage (nexmo) package in a Laravel application to send an SMS notice to a mobile phone. The Laravel ecosystem has several fantastic options for sending notification messages, and this laravel notification tutorial will show you how to use the Nexmo SMS API to deliver SMS messages. For sending messages to phones, we use the Nexmo SMS API; this package provides global communication support with a top-notch configurable solution. Not only that, but it also includes: - Support for scalable voice messaging that is both robust and simple. - Unified Communications has video and data capabilities. - APIs for communication
Laravel 9 Send SMS Notification or Messages to Phone Example
Table of Content
- Step 1: Create Laravel Project - Step 2: Install Nexmo SMS Package - Step 3: Generate and Configure Controller - Step 4: Set up Route - Step 5: Run Laravel App
Step 1 - Create Laravel Project
If you haven't already done so, go to the terminal screen and execute the composer command with the create-project flag to build a new Laravel application: composer create-project --prefer-dist laravel/laravel cyber After the installation is complete, go to the root of the project:
Step 2 - Setting Up Vonage (Nexmo) SMS Package
Vonage (previously known as Nexmo) is a well-known communication service provider; Laravel integrates seamlessly with Vonage and streamlines the SMS-to-phone procedure. Following that, we must create a new Vonage account and have sufficient API access. You must fill in your name and email address to create a Voyage account; once you have completed the account creation process, you can access the SMS API dashboard. It will first credit some funds to your account, which you may use to send SMS to your phone. You will also need to select the programming language in which you will construct the SMS sending app. Also, use the composer command to install the nexmo client: composer require nexmo/client You'll need the Nexmo key and secret to build consensus between the Laravel app and Vonyage client. As a result, go to the left sidebar and click the Getting started link. Also, from the Vonyage API dashboard, copy both the key and the secret.

Step 3 - Generate and Configure Controller
Now, using the compoer command, create a new controller: php artisan make:controller NotificationController Because the preceding operation created a controller, open the file app/Http/Controllers/NotificationController.php and add the following code: Read the full article
0 notes
Video
youtube
Make Business Directory Listing Website like IndiaMart & Justdial Demo
Front End: https://websolutionus.com/cc/dirlist/
Admin Panel: https://websolutionus.com/cc/dirlist/admin Admin Panel Login: [email protected] | 1234
Staff Panel: https://websolutionus.com/cc/dirlist/staff Staff Panel Login: [email protected] | 1234
User Panel: https://websolutionus.com/cc/dirlist/ User Panel Login: [email protected] | 1234
Key Features
· Laravel 8 is used as language
· Bootstrap 5 is used in design
· User friendly codes and easy to navigate
· Eye-catching design
· RTL support
· Language change option
· Strong security of codes
· Search by name, location and category in the home page
· Quick Add listing button on the menu
· Easily navigate to user login and registration pages.
· Subscription verify with email
· Payment gateways: Paypal, Stripe, RazorPay, Flutterwave, Paystack, Mollie, Instamojo and Bank
Admin Features
· SEO Settings for all pages
· SMTP server mail
· Email configuration and template setting
· Facebook or manual comment setup option for blog
· Cookie Consent option
· Google Recaptcha option
· Google Analytic option
· Preloader on/off option
· Tawk Live Chat option
· Pagination option
· Multi admin creation possible
· Multi Staff creation possible
· All Banner images change option
· Admin and Staff login page photo change option
· Clear database option to start the website as fresh installation
· Order view and delete by admin
· Manage all listing by admin
· User list view
· Listing create, edit and delete option
· Manage Multiple Listing Image and Video
· Listing Schedule create, edit and delete option
· Listing Category create, edit and delete option
· Listing Amenities create, edit and delete option
· Listing Location create, edit and delete option
· Package create, edit and delete option
· Manage Listing Claim Option
· Manage Listing Review Option
· Testimonial create, edit and delete option
· About Page information edit option
· Terms and Privacy Policy Page information edit option
· Custom dynamic pages create, edit and delete option
· Language change option for front end and back end
· Home page sections manage with on/off option
· Slider photo manage
· Subscriber manage with email to subscribers option
· Profile information, photo, password change option
· Forget and reset password option
· Blog Category create, edit and delete option
· Blog create, edit and delete option
· Manage Blog Comments
Staff Features
· Login, forget and reset password option
· Profile information, photo, password change option
· Listing create, edit and delete option
· Listing Schedule create, edit and delete option
· Manage Multiple Listing Image and Video
User Features
· User registration system with email verification
· User Login, forget and reset password option
· Profile information, photo, password change option
· Purchase Package and payment with stripe, paypal, razorpay and bank
· Listing create, edit and delete option
· Listing Schedule create, edit and delete option
· Manage Multiple Listing Image and Video
· Manage Reviews
· Manage Wishlists
· See orders and details.
· Claim submit option under the listing
Requirements
· PHP >= 7.2.5
· BCMath PHP Extension
· Ctype PHP Extension
· Fileinfo PHP extension
· JSON PHP Extension
· Mbstring PHP Extension
· OpenSSL PHP Extension
· PDO PHP Extension
· Tokenizer PHP Extension
· XML PHP Extension
Technology used:
Compatible Browsers
IE11, Firefox, Safari, Opera, Chrome, Edge
Files Included
JavaScript JS, JavaScript JSON, HTML, CSS, PHP, SQL
Software Framework
Laravel
0 notes
Text
Visual Studio Laravel

Visual Studio Laravel
Search results for 'laravel', Visual Studio Code on marketplace.visualstudio.com. Out of the blue, Microsoft jumps into the editor wars with an incredible offering that gives Sublime Text an overwhelming run for its money. In fact, it just might surpass it! So come along, as I demonstrate the ins, the outs, the tips, the techniques. Say hello to your new best friend: Visual Studio Code. Laravel Intellisense is a Visual Studio Code plugin by Mohamed Benhida that provides some nice auto-completion for things like Eloquent models, factories, config, and API resources. The extension works only on Laravel projects and a project is considered a Laravel project only if there is an artisan file in the root directory. Gaurav Makhecha; Credits. PHP Parser by Glayzzle. Currently, you're free to use this extension. I would highly appreciate you buying the world a.

Visual Studio Laravel
Travel through your Laravel app by just clicking on links.
Features
Open Latest Log File
Open latest log file from anywhere. Select the Command Laravel Traveller: Open Latest Log File or press Ctrl+o Ctrl+l (Cmd+o Cmd+l for Mac). You can change the default keyboard shortcut as well.
Technical Notes
The following glob pattern is used to search log files: 'storage/logs/laravel*.log'
Route -> Controller
Link to controller + action from the routes files:
Link to controller + action as per route group namespace:
You can add a simple comment // Route::namespace = NAMESPACE to apply group namespace on file. For example, the routes/api.php in the Laravel app has Api namespace applied by default.
Technical Notes
The controller links are added only in the files that are inside /routes directory or sub-directories and end with .php
php-parser by glayzzle is being used to get the AST of the file and add links based on that.
We consider only the static calls to Route::(get/post/put/patch/delete) and add links to the second parameter of those calls.
We suggest you to write route groups like: Route::namespace('Admin')->group(function() (..)) (as per Laravel documentation) instead of Route::group(('namespace' => 'Admin'), function() (..)) (namespace not supported by extension this way).
Automatic Controller Creation
If the controller does not exist, you'll be asked whether the extension should create it for you automatically. Action method will also be added to the controller. If you want to customize the stub that is used to create the controller, Add stubs/controller.plain.stub to your project's root directory. Please check the Stub Customization section of the Laravel documentation for instructions.
Technical Notes
For automatic controller creation, the default namespace is set to AppHttpControllers.
Automatic Method Creation
If the method does not exist, you'll be asked whether the extension should create it for you automatically. If you want to customize the stub that is used to create the method, Add stubs/method.stub to your project's root directory. (( methodName )) placeholder will be replaced with the actual method name.
Technical Notes
php-parser by glayzzle is being used to get the AST of the controller file and add the method to the end of the file. Basic expectations are that there will be a namespace at the top, a class, and at least 1 method in the controller file.
Controller -> View
Link to blade views from the controllers:
Technical Notes
The view links are added only in the files that are inside /app/Http/Controllers directory or sub-directories and end with .php
It uses this regex to find lines with view helper: ^s*return view((')(https://github.com/freshbitsweb/laravel-traveller/blob/master/.*?)(').*).*$
Currently, it links to the blade files in resources/views directory.
Mailable -> View
Link to blade views from the Mail classes:
Technical Notes
The view or markdown links are added only in the files that are inside /app/Mail directory or sub-directories and end with .php
It uses this regex to find lines with view or markdown method call: ^.*->(?:view|markdown)((')(https://github.com/freshbitsweb/laravel-traveller/blob/master/.*?)(').*).*$
Currently, it links to the blade files in resources/views directory.
View -> View
Link to blade views from the blade view:
Technical Notes
The view or markdown links are added only in the files that are inside /resources/views directory or sub-directories and end with .blade.php
It uses this regex to find lines with view or markdown method call: ^.*@(?:extends|include)((')(https://github.com/freshbitsweb/laravel-traveller/blob/master/.*?)(').*).*$
Currently, it links to the blade files in resources/views directory.
Route -> View
Link to blade views from the Route files:
Technical Notes
The view links are added only in the files that are inside /routes directory or sub-directories and end with .php
php-parser by glayzzle is being used to get the AST of the file and add links based on that.
Currently, it links to the blade files in resources/views directory.
Model -> Model
Link to models from the related model files:
Technical Notes
The model links are added only in the files that are inside /app directory and end with .php. and links to models in app directory only.
It uses this regex to find lines with relationship calls: ^s*return $this->(?:hasOne|belongsTo|hasMany|belongsToMany|morphOne|morphMany)((')(https://github.com/freshbitsweb/laravel-traveller/blob/master/.*?)(').*$
Route -> Route
Link to other routes from route files:
Technical Notes
The route links are added only in the files that are inside /routes directory and end with .php.
The definitions needs to be in this format: Route::group((), base_path('(ROUTE_FILE_PATH)'));
Configuration
5 of the features: Route -> Controller, Controller -> View, Mailable -> View, View -> View, and Model -> Model are toggelable: You can disable them from VSCode settings if you do not need them.
Technical Notes
The extension works only on Laravel projects and a project is considered a Laravel project only if there is an artisan file in the root directory.
Authors
Credits
Treeware
Currently, you're free to use this extension. I would highly appreciate you buying the world a tree in return.
Evernote is chinese app store. It’s now common knowledge that one of the best tools to tackle the climate crisis and keep our temperatures from rising above 1.5C is to plant trees. If you contribute to our forest you’ll be creating employment for local families and restoring wildlife habitats.
WPS Office for Mac. WPS PDF to Word 40.3MB. WPS Office For Linux. WPS Data Recovery Master 5.5MB. WPS Office For Android. WPS Office For iOS. WPS PDF For Android. PDF Editor For Android. PDF Converter Pro For Android. WPS Fill & Sign. Wps english download. Download WPS A new generation of office solutions With PDF, Cloud, OCR, file repair, and other powerful tools, WPS Office is quickly becoming more and more people’s first choice in office software.
You can buy trees at for our forest here offset.earth/treeware
To use Astropad Studio you will need to make a user account. Creating a user account is easy, by entering your email and making a password. Your user license for Astropad Studio will be tied to this account. To enter Studio, log in to your user account through your iPad. Luna Display turns any Mac or iPad into a wireless second display for Mac. Makers of Astropad Studio and Luna Display. Turn your iPad into a drawing tablet with Astropad Studio. Extend your Mac display to any iPad or Mac with Luna Display. Astropad. Enjoy a 30-day free trial! Pick a payment plan to get started.
Notes on silencing. Read more about Treeware at treeware.earth
Special Thanks to
Laravel Community
VS Code Community
0 notes
Text
The Web development wars- Laravel vs. Core PHP

From its launch back in 1995, PHP has since taken the web development world by storm, and now a decade and a half later, PHP is still going strong. According to data from W3tech, 79% of all websites with a server-side programming language use PHP. That roughly translates into 8 out of every 10 websites you visit, making PHP one of the most popular and opted for web development languages in the industry. But in this article, we are going to pit the old against the new, a brawl between Core PHP and Laravel, a framework of PHP itself.
The question arises, why would you want to compare a programming language and a framework based on the same programming language? The answer is simple- to find the optimal techniques for robust and rapid web development. Thanks to the extra edge that newer frameworks like Laravel provide, Core PHP might face tough competition from its spawn. So without further ado, let the clash commence.
The contenders- Core PHP vs. Laravel
As a fitting initiation of this clash, let us begin with a brief introduction to the contenders touching upon their strengths-
Core PHP
Core PHP is the foundation programming language of all PHP frameworks, including Laravel. Web application development through Core PHP can enable creating an exceptionally dynamic application that can test the limits of web development possibilities.
Some notable enterprises using Core PHP for their websites and web apps are-
WordPress, Etsy, Wikipedia, MailChimp, Slack, Tumblr, Facebook.
Enumerated below are the advantages that Core PHP brings to your web development initiative-
1. Flexibility
Core PHP is 'custom-based,' which makes it the perfect platform for experimentation and execution of ‘out of the box’ ideas that go beyond set structures of frameworks to deliver completely new efficiencies and features that add real-world value to your enterprise's development initiative.
2. Ease of development
With core PHP, no library that needs to be referenced, which means that you will have little or no additions while creating your website/web application, thus doing away with the constrictive hassle and building your app through a framework.
Laravel
Laravel sports and elegant and expressive syntax that makes development a creative and fulfilling experience. By easing out inherent tasks of web development such as routing, caching, sessions, and authentication, Laravel makes development enjoyable while not sacrificing app functionality in the least. Laravel provides powerful tools such as inverted control containers, expressive migration systems, and integrated unit testing, to name a few.
Some enterprises using Laravel for their websites and web apps are-
BBC, Pfizer, 9Gag, Aboutyou, Ratio, Crowdcube, TourRadar
Here are a few of the many advantages that Laravel can bring to your web development project-
1. Authentication
Laravel has an extremely sorted and structure authentication process that is simple to implement.
2. Libraries
Laravel sports massive object-oriented libraries optimized to provide a clear modular structure while easing maintenance and later modifications.
1. Artisan
A tool unique to the Laravel framework, Artisan, serves as a command terminal to efficiently control a project by easing repetitive and tedious coding tasks.
2. Migration
Unlike other databases, migration projects in Laravel are simplistic and easy with ‘seeding’ that allows data changes across all development machines.
Utilizations for Core PHP and Laravel
Both PHP and Laravel are extensively used by enterprises across industry verticals with a variety of applications. To illustrate the capabilities of Core PHP and Laravel, here a few utilities of both-
· Core PHP utilities-
PHP is one of the longest standing and easily the most preferred programming language for web applications and sites. Business giants like Facebook, Google, and Wikipedia utilize PHP. Here are some of the utilizations of Core PHP-
· Enhanced Cybersecurity
PHP development helps you integrate robust cybersecurity protocols on your website/web application development initiative that effectively prevent and diffuse cyber attacks. With PHP code forming the base of your web application, developers can easily identify attacks and take necessary precautions.
· Customizable script codes
Core PHP offers minimized dependency on third-party email features. With PHP code in place, it is easy for a website to send notifications to clients. These notifications can also be used as sales tools, given that they can carry important messages about new products and services.
· Cloud integration
Cloud is the new enfant-terrible of the IT ecosystem. Hire PHP developers for adding powerful integration capabilities to bring cloud tech to your website and give it a competitive edge by easing workflows and allowing for innovative sales and service administrations.
· CMS systems
Content management systems are a pre-requisite for almost all businesses. PHP-powered solutions allow for the ease of adding and updating content aligned to your target audience.
· Laravel utilities
Laravel development allows programmers to rapidly create integrative and extensible services/features for web applications. Some of the primary utilities of the framework are-
· Custom applications
Laravel development can create a wide variety of custom web applications that flexibly fit the requirements of both large and small enterprises and their target customers. Custom applications built with Laravel are fast and effective, and as an added advantage, help front-end developers in delivering an impactful output with its integrated blade templating engine.
· MVC architecture
While the modular architecture of Core PHP works just fine, Laravel’s MVC ( Model View Controller) architecture facilitates exceptional support and performance capacities. In large projects with tons of unstructured code, MVC architecture can help simplify coding structure and subsequently easing workflows.
· Eloquent ORM
With Laravel models, business application performance can be enhanced easily. Laravel is the only PHP framework that enables easy construction and customization of models using the Eloquent ORM (object-relational mapper). It maintains fluid interactions with app database objects with simple syntax.
· App testing
Laravel development services offer a set of features that facilitate unit and feature testing on your web applications through PHPUnit. Unit tests are best for smaller code portions and feature tests for larger codebases. Laravel is capable of running numerous unit tests simultaneously while making sure that all new changes are properly tested, making your application highly performant and bug-free.
Core PHP and Laravel- The Face-Off
It may seem that Laravel has already begun swinging heavy blows at its progenitor Core PHP, but the battle has only just begun. Now that we know what each contender has brought to the battlefield, let's begin the bout and have a Face-Off (Read: feature comparison) between the two.
1. Structure- Core PHP has a modular structure, while Laravel sports an MVC structure.
Point to- Laravel
2. Code reusability- Core PHP has a faster development process, yet Laravel beats this with code reusability.
Point to- Laravel
3. Flexibility- Being a framework Laravel has strict development rules while Core PHP is a programming language, and therefore sports enhanced code flexibility.
Point to- Core PHP
4. Caching- Laravel facilitates cache back ends with multiple configurations while Core PHP has no caching mechanism.
Point to- Laravel
5. External dependency- In Laravel, your app will have external dependencies, which may affect stability, while Core PHP has no external dependencies.
Point to-Core PHP
6. Security- Laravel has default authorization and authentication systems, while Core PHP needs security rules to be integrated during development.
Point to- Laravel
3. Data communication- In Laravel, data communication is authorized via a security token that prevents posting data from other domains, while Core PHP does not have default data communication authorizations.
Point to- Laravel
7. Error and exception handling- Error and exception handling protocols are already configured in Laravel, while Core PHP does not support default error and exception handling facilities.
Point to- Laravel
The bout's ruling:
After 8 rounds (read: points) of throwing concussive jabs at each other, Core PHP stands its ground with code structure, flexibility, and lack of external dependencies in applications developed while Laravel gains the upper hand by scoring over Core PHP in terms of Data communication, error and exception handling, security, caching and code reusability.
Laravel emerges as a next-gen solution that doesn't undermine Core PHP's efficiency and yet adds value to the overall PHP development ecosystem. To make the comparison simpler, development in Core PHP is like solving a mathematical problem on paper, while Laravel mimics solving the problem using a calculator.
Summing it all up
Now Comes the question, What should you choose for your development initiative, Core PHP, or Laravel. The answer is subjective.
Your choice between Laravel and Core PHP should be based entirely on the type of project you wish to commence working on. Selecting the right web application development company and the right tool for the right job is of paramount importance in all forms of development efforts, and you must reflect upon which advantages of Laravel and Core PHP would your enterprise benefit the most by cashing upon.
0 notes
Text
Laravel Weak Password Policies: Risks & Fixes
In today’s digital era, password security is crucial to safeguarding sensitive data. Weak password policies in Laravel applications can expose your system to brute-force attacks, unauthorized access, and data breaches. This blog explores weak password policies, their risks, and how to mitigate them using Laravel's built-in tools.

We'll include coding examples and highlight how you can leverage our Free Website Security Scanner tool for enhanced security.
What are Weak Password Policies?
Weak password policies refer to rules that fail to enforce strong password creation, such as allowing short passwords or lacking complexity requirements. In Laravel, default configurations might not always align with best practices unless explicitly defined.
Risks of Weak Password Policies:
Brute-Force Attacks: Attackers repeatedly try various password combinations to gain access.
Credential Stuffing: Reused passwords can compromise multiple accounts.
Regulatory Non-Compliance: Weak policies may violate GDPR, HIPAA, or other data protection laws.
Implementing Strong Password Policies in Laravel
Laravel provides various tools to enforce robust password policies. Let’s configure them step by step:
Example 1: Enforcing Password Rules Using Laravel’s Validation
Laravel's Validator class allows you to define password rules. Below is an example of enforcing a strong password policy:
use Illuminate\Support\Facades\Validator; $validator = Validator::make($request->all(), [ 'password' => [ 'required', 'string', 'min:8', // Minimum length of 8 characters 'regex:/[A-Z]/', // At least one uppercase letter 'regex:/[a-z]/', // At least one lowercase letter 'regex:/[0-9]/', // At least one digit 'regex:/[@$!%*?&]/', // At least one special character ], ]); if ($validator->fails()) { return back()->withErrors($validator); }
Example 2: Using Laravel's Password Rule
Starting from Laravel 8, you can use the Password rule for cleaner code:
use Illuminate\Validation\Rules\Password; $request->validate([ 'password' => ['required', 'string', Password::min(8) ->letters() ->mixedCase() ->numbers() ->symbols() ->uncompromised()], ]);
The uncompromised method checks if the password has been exposed in any data breaches using the Have I Been Pwned API.
Real-World Scenario: Testing Weak Password Vulnerabilities
To ensure your Laravel application is secure, test for weak password policies using our Free Website Security Checker tool. Here’s a screenshot of the tool’s homepage:

Screenshot of the free tools webpage where you can access security assessment tools.
Run a vulnerability assessment on your website and view detailed insights on weak password risks. Below is an example report generated by our tool to test website security free:

An example of a vulnerability assessment report generated with our free tool provides insights into possible vulnerabilities.
Preventing Password Vulnerabilities
In addition to enforcing strong password rules, consider these measures:
Multi-Factor Authentication (MFA): Add a second layer of security.
Password Expiration: Force users to update passwords periodically.
Account Lockouts: Limit login attempts to prevent brute-force attacks.
Example 3: Enabling Account Lockouts in Laravel
You can use Laravel's ThrottleRequests middleware to limit login attempts:
use Illuminate\Support\Facades\RateLimiter; RateLimiter::for('login', function () { return Limit::perMinute(5)->by(request('email')); });
This configuration locks an account after five failed attempts within one minute.
Conclusion
Weak password policies in Laravel applications pose significant risks to your system’s security. By implementing strong validation rules, testing vulnerabilities, and employing additional security measures, you can protect your application and comply with industry standards.
Don’t forget to check your website’s security using our Website Security Checker Tool for real-time insights.
Stay proactive—secure your Laravel application today!
#cyber security#cybersecurity#data security#pentesting#security#the security breach show#laravel#password#php
0 notes
Text
Top Benefits of Laravel Development company
In the previous article, We were learning about some of the most obvious problems, which very frequently arise throughout web development, and how Laravel development company can resolve all these common problems fast and cost-effectively. Let's move forward with that.
Configuration Error and Exception Handling
The way a software application manages errors can have a big influence on user satisfaction and usability of the application. Without proper error administration, the user may determine that the problem is in the application (it is out of service) and run away from the application forever. Nobody can accept to expend their customers or to deceive them.
Laravel benefit #5.Error and exception handling is earlier configured for any new Laravel-based project. In addition, Hire Laravel Developer is integrated with the Monolog logging library, which presents support for a quality of important log handlers.
Automation of Testing Performance
Without testing and checking what the developer has built, how can anyone (including the developer) be confirmed that the software will work without any bangs, bugs, errors and in accordance with the initial application requirements? Automation testing is less time-consuming and in many cases more accurate than manual testing.
Laravel benefit #6. Laravel is developed with testing in mind. In fact, support for testing with PHP Unit is combined out-of-the-box and a phpunit.xml file is already setup for the application. The framework also directs with useful helper methods allowing for significant testing of the applications. It presents simple ways for fabricating basic behaviour of users (obtaining requests to the application and monitoring the output, for example, clicking links, filling out forms).
URL Routing Configuration
Users will use a web application by clicking or typing links. They will wish to view the craved content, for example, an article, a contact form, product specification etc. If there is no URL routing, the web application will never know what the user needs to view and may display a blank page or an error page instead.
Laravel benefit #7. All Top Laravel development company India routes are specified in the app/Http/routes.php file, which is automatically placed by the framework. The most essential Laravel routes easily receive a URI and a Closure, presenting a very simple and powerful method of defining routes.
Division of “Business Logic Code” from “Presentation Code”
Such division allows Html Layout Designers (less costly staff) to improve the representation of a web page effortlessly without associating with Developers (more pricey stuff). Possible bug fixes and highlight requests would be done by developers faster (read as “cost-effectively”) if all programming code of the web application has the proper separation at the early stage of the development.
Laravel benefit #8. Laravel is an MVC framework, so division is already made.
Message Queue System (Delayed Delivery) Configuration
It's not just about easy email messages, but regarding a lot of forms of interaction between different components of the application or between various applications. The more traffic a web application receives, the more requests it must manage per second, the higher the risk will be that hosting this application will be very costly or that the webserver will end working with data loss.
Laravel benefit #9. The Laravel line service presents a unified API across a diversity of different queue backends. Queues let you delay the processing of a time-consuming task, such as sending an e-mail, until a later time, which drastically races up web requests to your application.
Scheduling Tasks Configuration and Management
Whether it is required to send out emails to the subscribers each morning or automated cleanup of the database tables at the end of the day (to get the application work quicker, reducing the expense of hosting), any web app requires a task scheduling tool to take care of the jobs, when it’s time.
Laravel benefit #10. Earlier developers have created a Cron entry for every task they require to schedule. Such a task schedule is no longer in source control, and developers need SSH into the server to join the Cron entries. The Best Laravel development Company command scheduler permits for the easy and powerful determining of command schedule within Laravel itself, and only a single Cron entry is required on the server.
Let’s move forword with this in upcoming article.
0 notes
Photo

15 Best Flutter Mobile App Templates for Communication
Do you want to build and deploy fast, beautiful social media or communication apps for both Android and iOS?
Then you should consider creating a Flutter app. Using Flutter, you can write apps for both Android and iOS using a single codebase. And a Flutter app template makes it easy to get started.
What Is Flutter?
Flutter allows developers to build beautiful, natively compiled apps from a single codebase for both Android and iOS.
Flutter is now one of the most popular frameworks for developing cross-platform mobile apps. In addition to being a first-class platform for Material Design, developers consider it to be a great alternative to popular cross-platform frameworks like React Native, Ionic, and so on.
Flutter widgets abstract all critical platform differences such as scrolling, navigation, icons, and fonts to provide full native performance on both iOS and Android.
On CodeCanyon, you will find all the tools you need to start building your app with Flutter. With a Flutter app templates, all the coding has been done beforehand, you just need to concentrate on what makes your app unique.
Best Flutter App Templates for Communication
Communication apps have become crucial in today's world. On CodeCanyon you will find templates that will help you build apps that meet every communication needs.
Here are some of the best-selling Flutter mobile app templates to download on CodeCanyon for 2020.
15 Best Flutter Mobile App Templates for Communication
Let us have a look at some of the best Flutter mobile app templates for communication available on CodeCanyon.
I have divided them into the following categories: social media apps, video conferencing apps, dating apps, chat apps, and news apps.
Flutter Social Media App Templates
1. Trending: TikStar—TikTok Clone App UI in Flutter UI Template
TikStar is a TikTok clone and short video streaming mobile app UI template. TikStar was developed using Flutter. That means that the UI is compatible for both Android and iOS.
This social media Flutter mobile app has clean, well-formatted code that is easy to understand.
Features you will find in this amazing app include:
login, signup, and forgot password screens
login with phone number screen
OTP verification screen
carousel slider
animation
2. QVid—TikTok Clone App Flutter Template
Qvid is a social media video app for creating and sharing quick short personal, musical, comedy, and talent videos. This awesome looking social media Flutter mobile app comes with over 30 screens to choose from. It is easy to customize and reskin.
As a TikTok clone Flutter app template, it can also be used to build clones that closely resemble other popular apps.
3. Flutter Storyteller—Social Media Platform
Flutter Storyteller is a social media platform Flutter template which can help you build your own social app. It has a beautiful UI that is easy to customize thanks to the clean and reliable code of this Flutter social app.
Built using Flutter and with Laravel on the back-end, it comes with full, easy-to-use, step-by-step documentation.
4. HeyP—Flutter Social App
HeyP is an elegant Flutter social app that to helps uses connect with family and friends.
It comes with more than 16 screens and 40 widgets to help you customize your app.
The back-end is based on Node.js, and uses Firebase for push notifications. The same code is used for both iOS and Android.
Flutter Video Conferencing App Templates
5. MeetAir—Video Conferencing App for Live Classes
MeetAir is complete video meeting system that you can use to start your online meeting platform. You can use it for: video meetings, live classes, webinar, online training, web conferences, and more. It has a powerful admin panel to manage meetings, history, notification, analytics, and app configuration.
Using this Flutter app template you can build your own web, Android, and iOS video conference apps. No coding is required to use this video conferencing Flutter app template.
Other impressive features include:
lock-protected rooms to control access to your conferences with a password
schedule and add the meeting to your calendar.
chat and message with your team during meetings
high quality audio and video delivered with the clarity and richness of Opus and VP8
6. AeroMeet—Flutter Video Conference
AeroMeet is an online meeting platform to manage video conferences, live classes, meetings, webinars, and online training. It uses Agora SDK which is very popular for video calling and is a fast growing platform.
Some features of this highly configurable platform include:
secure and encrypted call.
host and join meeting from mobile.
mandatory login enable/disable.
unauthorized meeting ID protection.
meetings history
7. Connect—Video Conferencing App
Connect is a secure video conference platform where anyone can create an account and get connected to their loved ones without worrying of data theft.
This Flutter video conference app supports up to 70 people in a single conference call. You can create meetings with extra secure passcodes provided by Google. In addition, you can receive feedback from users on your desired email account.
Flutter Chat App Templates
8. Flutter Firebase Chat
Flutter Firebase Chat is a real time chatting app with video calling support based on Flutter, Firebase, and Agora.io. This Flutter chat mobile app template integrates a chat functionality into any existing Flutter app. Also you can easily customize and refine it for yourself, since it uses the BLoC pattern.
Main features of this app include:
one-to-one chat and video calls via Agora.io
group chat
image sharing
email authentication
9. Flutter Chat App With Node and MongoDB
This Flutter chat app is a versatile mobile chat system developed in the Dart language using Node.js for the back-end.
Admin accounts can delete posts and comments. They can also add and delete public chat rooms. Users can search for other users using email, read messages, and send text or images.
This app template comes with full Flutter source code, full Node.js back-end code, and extensive documentation including screenshots.
10. FlutterFire Social: Chat and Messenger
FlutterFire Social is a fully functional Flutter social messenger app with a Firebase back-end, You can post, like, comment and chat with people and more.
Other features include:
Firebase email authentication
realtime chat with online users
a group chat system including the ability to create and edit groups
admins can post, edit and delete
block and unblock users
Flutter Dating App Templates
11. Hookup4U—Complete Flutter Dating App
Hookup4U is a complete Flutter dating app template. Admins can change usernames and passwords, and have a detailed user viewer to search users, block users, and more. In addition, admins can create packages that include free and paid subscriptions.
Other features include:
authentication with Facebook and phone number (OTP based)
settings for profile visibility
like or unlike other profile pics based on settings
show matches
one-to-one text chat
one-on-one audio and video chat (Agora based)
12. Hookup4U—Tinderlike Flutter Dating UI kit
Hookup4u is a hybrid mobile dating app template in Flutter. It has all the UI you will find in a regular dating app. You can use this Flutter app template to create a fully functional dating app.
Some screens you will find in this UI kit include:
welcome
splash screen
login using Facebook and phone
verify OTP
Flutter News App Templates
13. Deco News Flutter App for WordPress
News apps are very popular but not everybody has the time and resources to build their own news app from scratch.
The Deco News Flutter Mobile App for WordPress converts your WordPress website into a native app that delivers news content on both Android and iOS.
14. FluxNews—Flutter Mobile App for WordPress
FluxNews is an app converts your Wordpress website into a mobile true native app with customized contents. No coding skill is required. It comes with a very clean design that is easy to customize. You can build your own app by using over 50 resuable widgets.
FluxNews maximizes your customer’s experience and usability through UX flow in both Android and iOS.
Additional features include:
offline images caching to speed up the loading performance
instant synchronization for smooth data update without downtime
support social login, SMS login by Facebook
15. News Hour—Flutter News App with Admin Panel
News Hour is complete news app with admin panel that is developed in Flutter.
It comes beautiful interactive user interface. There are 40 screen layouts to choose from. It has animation on every screen, making it one of the most user-friendly Flutter news app templates.
Users can login using Google and Facebook, search news categories, bookmark content, and also leave comments.
Build Your Flutter Mobile App Now!
A complete app developed from scratch will have a lot of components, screens, and functionality representing many hundreds or thousands of hours of developer time. That's a lot of time and effort on your part! The Flutter mobile apps templates available on CodeCanyon will shortcut this process and greatly save on development cost.
Google Flutter From Scratch Series
If you want to get started coding apps with Flutter, check out the Google Flutter From Scratch series on Envato Tuts+:
Android
Google Flutter From Scratch: Using Firebase Services
Ashraff Hathibelagal
Android SDK
Google Flutter From Scratch: Building Apps With Widgets
Ashraff Hathibelagal
Android SDK
Google Flutter From Scratch: Animating Widgets
Ashraff Hathibelagal
Android SDK
Google Flutter From Scratch: Grids, Lists, and Data Sources
Ashraff Hathibelagal
Android
Coding an Android App With Flutter and Dart
Ashraff Hathibelagal
And if you want even more Flutter app templates, check out my other post here on Envato Tuts+.
Flutter
23 Best Flutter Mobile App Templates on CodeCanyon
Franc Lucas
by Franc Lucas via Envato Tuts+ Code https://ift.tt/3cN311I
0 notes
Text
Tips & Tricks to Uplift Your Business With Laravel Web Development
Laravel framework is quite popular for custom software development. It's the Most Starred PHP Framework on Github: more than 56 000 developers from all over the world (mostly from the USA) greatly appreciate robust features of this platform. What's Laravel so popular? It provides the right tools to help build websites and web programs faster, more secure and quite easy to keep. Each owner of the web application should ensure that customers are who they claim to be and thus prevent unauthorized users from gaining access to secured/paid resources.
Laravel makes implementing authentication very simple. Virtually everything is configured . Laravel also gives a very simple way to arrange authority logic and management access to resources.
Mail service can be used to send notifications to users' emails after various events. It's difficult to imagine a contemporary web application, by way of example, lacking a simple email telling to some other user about their successful registration on the site.
Laravel provides a clean, simple API over the favorite SwiftMailer library. Besides support for sending email, Laravel offers assistance for sending notifications across a variety of delivery channels, including SMS (via Nexmo) and Slack.
Integration with Tools for Creating Web Software Faster
It's important not simply to make an application but also to create a speedy application, which will result in accelerating revenue. Integration with so-called caching backend is frequently one of the main measures taken to enhance a web application functionality.
Laravel supports popular cache backends like Memcached and Redis out-of-the-box. By default, Laravel is configured to utilize the document cache driver, which shops cached objects in the file . For larger applications, it's better to use an in-memory cache for example Memcached or APC. But with Laravel it's even possible to configure multiple cache configurations. .
Fixing the Most Common Technical Vulnerabilities
Security vulnerabilities go hand-in-hand with the growth of almost any web application. The programmer must not forget and be able to repair all them before shipping.
Laravel advantage #4. Laravel helps to secure the web application by protecting it against the most serious safety risks: SQL injection, cross-site request forgery, and cross-site scripting. Laravel itself is secure. We can tell you firsthand that the codebase is fanatically guarded, and that the code was vetted by several men and women.
Laravel Development Vulnerabilities
How a software application handles errors may have a big impact on user satisfaction and usability of the program. Data-entry forms are among the most frequent areas where errors are identified and presented after users click a Submit Button. If something doesn't work because of the person doing something incorrect, he/she should be notified about it at the handy form. If user's action cannot be completed as the user submitted erroneous information, it needs to be reported to him/her in an informative error message. Without appropriate error handling, the user may decide that the problem is in the program (it's out of service) and move away from the program indefinitely. No one wants to lose their clients to disappoint them.
Error and exception handling is configured to get any new Laravel-based endeavor. In addition, Laravel is incorporated together with the Monolog logging library, which provides support for an assortment of strong log handlers. Without testing and confirming exactly what the developer has produced, how can anyone (such as the developer) make confident the software will perform without any bugs bugs, errors and in accordance with the initial application requirements? Automation testing is less time-consuming and in several instances more precise than manual testing.
Laravel is constructed with testing in mind. In reality, support for testing with PHPUnit is comprised out-of-the-box and a phpunit.xml file is already set up for the application. The frame also ships with suitable helper methods enabling for expressive testing of the software. It provides easy ways for mimicking basic behaviour of consumers (making requests to the application and examining the output, for instance, clicking hyperlinks, filling out forms).
URL Routing Configuration
Users will utilize an internet application by clicking or clicking links. They'll expect to see that the desired content, as an example, an guide, a contact form, a product description etc.. When there's absolutely no URL routing, then the web application won't ever understand what the consumer would like to view and might reveal a blank page or an error page instead.
All Laravel paths are defined in the app/Http/routes.php document, which will be automatically loaded by the frame. The simplest Laravel routes simply accept a URI and a Closure, supplying a very straightforward and expressive method of defining paths.
Separation of"Business Logic Code" from"Demo Code" Such separation empowers Html Layout Designers (less costly staff) to change the look of a web page easily without interacting with all Developers (more expensive stuff).
Laravel benefit #8. Laravel is a MVC framework, so separation is currently done. See the figure: the full MVC request cycle in a Laravel 5 program.
Laravel Development MVC Approach
It is not just about simple email messages, however about a lot of types of communication between various areas of the program or between different software. The more traffic a web application gets, the more requests it must handle per second, the bigger the risk will be that hosting this program will be quite expensive (especially, cloud hosting) or that the web server will stop working with data reduction.
No stakeholder likes to appear in situations such as this. To prevent it, developers may decide to use the message system at the start of project development among other techniques for load balancing, raising program's rate and maintaining data integrity.
The Laravel queue service provides a unified API across a variety of different queue backends. Queues allow you to defer the processing of a time-consuming task, like sending an e-mail, until a later period, which radically increases up web requests to your application.
Whether it's necessary to send out emails to the readers every morning or automatic cleanup of these database tables in the end of the day (to make the application faster and to reduce the cost of hosting), any web app needs a task scheduling mechanism to take care of the tasks, when it's time.
Previously, programmers have generated a Cron entrance for each task they will need to program. Nonetheless, this is a headache. Such task schedule is no longer in source management, and developers need to SSH into the machine to add the Cron entries. The Laravel control scheduler allows for the fluent and expressive setting of command program inside Laravel itself, and just a solitary Cron entry is necessary on the server.
Author Bio:
Salman Ahmed is a Business Manager at Magneto IT Solutions – a web development company in Bahrain offers quality Laravel Development, Magento development,android app development, furniture Store development, mobile app development services. The company has experienced Laravel developers for hire at very affordable price. He is a firm believer in teamwork; for him, it is not just an idea, but also the team’s buy-in into the idea, that makes a campaign successful! He’s enthusiastic about all things marketing.
0 notes
Link
Nuxt.js provides an Axios module for easy integration with your application. Axios is a promise-based HTTP client that works in the browser and Node.js environment or, in simpler terms, it is a tool for making requests (e.g API calls) in client-side applications and Node.js environment. In this tutorial, we’re going to learn how to use the Axios module and how to make a request on the server-side using asyncData and fetch. These two methods make a request on the server-side but they have some differences which we’re also going to cover. Finally, we’ll learn how to perform authentication and secure pages/routes using the auth module and auth middleware. This article requires basic knowledge of Nuxtjs and Vuejs as we’ll be building on top of that. For those without experience with Vuejs, I recommend you start from their official documentation and the Nuxt official page before continuing with this article.
What Is The Nuxt.js Axios Module?
According to the official Documentation,
“It is a Secure and easy Axios integration with Nuxt.js.”
Here are some of its features:
Automatically set base URL for client-side & server-side.
Proxy request headers in SSR (Useful for auth).
Fetch Style requests.
Integrated with Nuxt.js Progressbar while making requests.
To use the axios module in your application, you will have to first install it by using either npm or yarn. YARN
yarn add @nuxtjs/axios
NPM
npm install @nuxtjs/axios
Add it into your nuxt.config.js file:
modules: [ '@nuxtjs/axios', ], axios: { // extra config e.g // BaseURL: 'https://link-to-API' }
The modules array accepts a list of Nuxt.js modules such as dotenv, auth and in this case, Axios. What we’ve done is to inform our application that we would be using the Axios module, which we reference using @nuxtjs/axios. This is then followed by the axios property which is an object of configurations like the baseURL for both client-side and server-side. Now, you can access Axios from anywhere in your application by calling this.$axios.method or this.$axios.$method. Where method can be get, post, or delete.
Making Your First Request Using Axios
For this tutorial, I’ve put together a simple application on Github. The repository contains two folders, start and finish, the start folder contains all you need to get right into the tutorial. The finish folder contains a completed version of what we would be building. After cloning the repo and opening the start folder, we would need to install all our packages in the package.json file so open your terminal and run the following command:
npm install
Once that is done, we can start our app using the npm run dev command. This is what you should see when you go to localhost:3000.
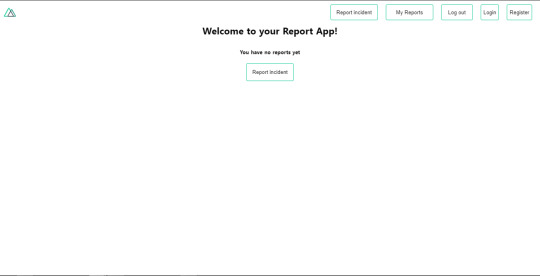
Our application’s landing page. (Large preview)
The next thing we have to do is to create a .env file in the root folder of our application and add our API URL to it. For this tutorial, we’ll be using a sample API built to collect reports from users.
API_URL=https://ireporter-endpoint.herokuapp.com/api/v2/
This way, we do not have to hard code our API into our app which is useful for working with two APIs (development and production). The next step would be to open our nuxt.config.js file and add the environmental variable to our axios config that we added above.
/* ** Axios module configuration */ axios: { // See https://github.com/nuxt-community/axios-module#options baseURL: process.env.API_URL, },
Here, we tell Nuxt.js to use this baseURL for both our client-side and server-side requests whenever we use this Axios module. Now, to fetch a list of reports, let us open the index.vue file and add the following method to the script section.
async getIncidents() { let res = await this.$store.dispatch("getIncidents"); this.incidents = res.data.data.incidents; }
What we have done is to create an async function that we call getIncidents() and we can tell what it does from the name — it fetches a list of incidents using the Vuex store action method this.$store.dispatch. We assign the response from this action to our incidents property so we can be able to make use of it in the component. We want to call the getIncidents() method whenever the component mounts. We can do that using the mounted hook.
mounted() { this.getIncidents() }
mounted() is a lifecycle hook that gets called when the component mounts. That will cause the call to the API to happen when the component mounts. Now, let us go into our index.js file in our store and create this action where we’ll be making our Axios request from.
export const actions = { async getIncidents() { let res = await this.$axios.get('/incidents') return res; } }
Here, we created the action called getIncidents which is an async function, then we await a response from the server and return this response. The response from this action is sent back to our getIncidents() method in our index.vue file. If we refresh our application, we should now be able to see a long list of incidents rendered on the page.
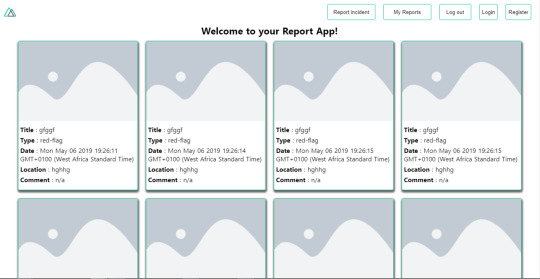
List of incidents on landing page. (Large preview)
We have made our first request using Axios but we won’t stop there, we are going to be trying out asyncData and fetch to see the differences between them and using Axios.
AsyncData
AsyncData fetches data on the server-side and it’s called before loading the page component. It does not have access to this because it is called before your page component data is created. this is only available after the created hook has been called so Nuxt.js automatically merges the returned data into the component’s data. Using asyncData is good for SEO because it fetches your site’s content on the server-side and also helps in loading content faster. Note that asyncData method can only be used in the pages folder of your application as it would not work in the components folder. This is because asyncData hook gets called before your component is created.
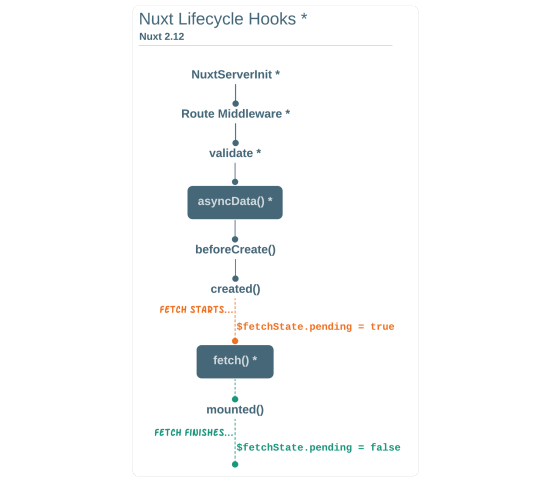
Image from Nuxt blog. (Large preview)
Let us add asyncData to our index.vue file and observe how fast our incidents data loads. Add the following code after our components property and let us get rid of our mounted hook.
async asyncData({ $axios }) { let { data } = await $axios.get("/incidents"); return { incidents: data.data.incidents }; }, // mounted() { // this.getIncidents(); // },
Here, the asyncData method accepts a property from the context $axios. We use this property to fetch the list of incidents and the value is then returned. This value is automatically injected into our component. Now, you can notice how fast your content loads if you refresh the page and at no time is there no incident to render.
Fetch
The Fetch method is also used to make requests on the server-side. It is called after the created hook in the life cycle which means it has access to the component’s data. Unlike the asyncData method, the fetch method can be used in all .vue files and be used with the Vuex store. This means that if you have the following in your data function.
data() { return { incidents: [], id: 5, gender: 'male' }; }
You can easily modify id or gender by calling this.id or this.gender.
Using Axios As A Plugin
During the process of development with Axios, you might find that you need extra configuration like creating instances and interceptors for your request so your application can work as intended and thankfully, we can do that by extending our Axios into a plugin. To extend axios, you have to create a plugin (e.g. axios.js) in your plugins folder.
export default function ({ $axios, store, redirect }) { $axios.onError(error => { if (error.response && error.response.status === 500) { redirect('/login') } }) $axios.interceptors.response.use( response => { if (response.status === 200) { if (response.request.responseURL && response.request.responseURL.includes('login')) { store.dispatch("setUser", response); } } return response } ) }
This is an example of a plugin I wrote for a Nuxt application. Here, your function takes in a context object of $axios, store and redirect which we would use in configuring the plugin. The first thing we do is to listen for an error with a status of 500 using $axios.onError and redirect the user to the login page. We also have an interceptor that intercepts every request response we make in our application checks if the status of the response we get is 200. If that is true we proceed and check that there is a response.request.responseURL and if it includes login. If this checks out to be true, we then send this response using our store’s dispatch method where it then mutated in our state. Add this plugin to your nuxt.config.js file:
plugins: [ '~/plugins/axios' ]
After doing this, your Axios plugin would intercept any request you make and check if you have defined a special case for it.
Introduction To The Auth Module
The auth module is used for performing authentication for your Nuxt application and can be accessed from anywhere in your application using $this.auth. It is also available in fetch, asyncData, middleware and NuxtInitServer from the context object as $auth. The context provides additional objects/params from Nuxt to Vue components and is available in special nuxt lifecycle areas like those mentioned above. To use the auth module in your application, you would have to install it using yarn or npm. YARN
yarn add @nuxtjs/auth
NPM
npm install @nuxtjs/auth
Add it to your nuxt.config.js file.
modules: [ '@nuxtjs/auth' ], auth: { // Options }
The auth property accepts a list of properties such as strategies and redirect. Here, strategies accepts your preferred authentication method which can be:
local For username/email and password-based flow.
facebook For using Facebook accounts as a means of authentication.
Github For authenticating users with Github accounts.
Google For authenticating users with Google accounts.
Auth0
Laravel Passport
The redirect property accepts an object of links for:
login Users would be redirected to this link if login is required.
logout Users would be redirected here if after logout current route is protected.
home Users would be redirected here after login.
Now, let us add the following to our nuxt.config.js file.
/* ** Auth module configuration */ auth: { redirect: { login: '/login', logout: '/', home: '/my-reports' }, strategies: { local: { endpoints: { login: { url: "/user/login", method: "post", propertyName: "data.token", }, logout: false, user: false, }, tokenType: '', tokenName: 'x-auth', autoFetchUser: false }, }, }
Please note that the auth method works best when there is a user endpoint provided in the option above. Inside the auth config object, we have a redirect option in which we set our login route to /login, logout route to / and home route to /my-reports which would all behave as expected. We also have a tokenType property which represents the Authorization type in the header of our Axios request. It is set to Bearer by default and can be changed to work with your API. For our API, there is no token type and this is why we’re going to leave it as an empty string. The tokenName represents the Authorization name (or the header property you want to attach your token to) inside your header in your Axios request. By default, it is set to Authorization but for our API, the Authorization name is x-auth. The autoFetchUser property is used to enable user fetch object using the user endpoint property after login. It is true by default but our API does not have a user endpoint so we have set that to false. For this tutorial, we would be using the local strategy. In our strategies, we have the local option with endpoints for login, user and logout but in our case, we would only use the *login* option because our demo API does not have a *logout* endpoint and our user object is being returned when *login* is successful. Note: The auth module does not have a register endpoint option so that means we’re going to register the traditional way and redirect the user to the login page where we will perform the authentication using this.$auth.loginWith. This is the method used in authenticating your users. It accepts a ‘strategy’ (e.g local) as a first argument and then an object to perform this authentication with. Take a look at the following example.
let data { email: '[email protected]', password: '123456' } this.$auth.loginWith('local', { data })
Using The Auth Module
Now that we have configured our auth module, we can proceed to our registration page. If you visit the /register page, you should see a registration form.
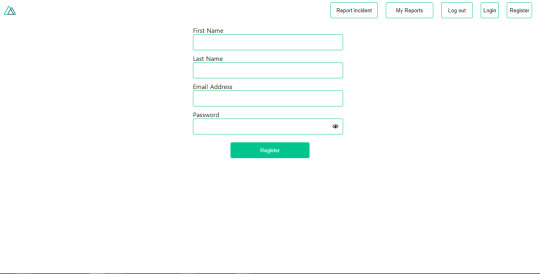
Register page. (Large preview)
Let us make this form functional by adding the following code:
methods: { async registerUser() { this.loading = true; let data = this.register; try { await this.$axios.post("/user/create", data); this.$router.push("/login"); this.loading = false; this.$notify({ group: "success", title: "Success!", text: "Account created successfully" }); } catch (error) { this.loading = false; this.$notify({ group: "error", title: "Error!", text: error.response ? error.response.data.error : "Sorry an error occured, check your internet" }); } } }
Here, we have an async function called registerUser which is tied to a click event in our template and makes an Axios request wrapped in a try/catch block to an endpoint /user/create. This redirects to the /login page and notifies the user of a successful registration. We also have a catch block that alerts the user of any error if the request is not successful. If the registration is successful, you would be redirected to the login page.
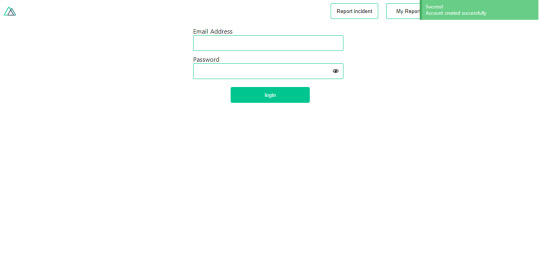
Login page with notification component. (Large preview)
Here, we’re going to make use of auth authentication method this.$auth.loginWith('local', loginData) after which we would use the this.$auth.setUser(userObj) to set the user in our auth instance. To get the login page working, let’s add the following code to our login.vue file.
methods: { async logIn() { let data = this.login; this.loading = true; try { let res = await this.$auth.loginWith("local", { data }); this.loading = false; let user = res.data.data.user; this.$auth.setUser(user); this.$notify({ group: "success", title: "Success!", text: "Welcome!" }); } catch (error) { this.loading = false; this.$notify({ group: "error", title: "Error!", text: error.response ? error.response.data.error : "Sorry an error occured, check your internet" }); } } }
We created an async function called logIn using the auth method this.$auth.loginWith('local, loginData). If this login attempt is successful, we then assign the user data to our auth instance using this.$auth.setUser(userInfo) and redirect the user to the /my-report page. You can now get user data using this.$auth.user or with Vuex using this.$store.state.auth.user but that’s not all. The auth instance contains some other properties which you can see if you log in or check your state using your Vue dev tools. If you log this.$store.state.auth to the console, you’ll see this:
{ "auth": { "user": { "id": "d7a5efdf-0c29-48aa-9255-be818301d602", "email": "[email protected]", "lastName": "Xo", "firstName": "Tm", "othernames": null, "isAdmin": false, "phoneNumber": null, "username": null }, "loggedIn": true, "strategy": "local", "busy": false } }
The auth instance contains a loggedIn property that is useful in switching between authenticated links in the nav/header section of your application. It also contains a strategy method that states the type of strategy the instance is running (e.g local). Now, we will make use of this loggedIn property to arrange our nav links. Update your navBar component to the following:
<template> <header class="header"> <div class="logo"> <nuxt-link to="/"> <Logo /> </nuxt-link> </div> <nav class="nav"> <div class="nav__user" v-if="auth.loggedIn"> <p></p> <button class="nav__link nav__link--long"> <nuxt-link to="/report-incident">Report incident</nuxt-link> </button> <button class="nav__link nav__link--long"> <nuxt-link to="/my-reports">My Reports</nuxt-link> </button> <button class="nav__link" @click.prevent="logOut">Log out</button> </div> <button class="nav__link" v-if="!auth.loggedIn"> <nuxt-link to="/login">Login</nuxt-link> </button> <button class="nav__link" v-if="!auth.loggedIn"> <nuxt-link to="/register">Register</nuxt-link> </button> </nav> </header> </template> <script> import { mapState } from "vuex"; import Logo from "@/components/Logo"; export default { name: "nav-bar", data() { return {}; }, computed: { ...mapState(["auth"]) }, methods: { logOut() { this.$store.dispatch("logOut"); this.$router.push("/login"); } }, components: { Logo } }; </script> <style></style>
In our template section, we have several links to different parts of the application in which we are now using auth.loggedIn to display the appropriate links depending on the authentication status. We have a logout button that has a click event with a logOut() function attached to it. We also display the user’s email gotten from the auth property which is accessed from our Vuex store using the mapState method which maps our state auth to the computed property of the nav component. We also have a logout method that calls our Vuex action logOut and redirects the user to the login page. Now, let us go ahead and update our store to have a logOut action.
export const actions = { // .... logOut() { this.$auth.logout(); } }
The logOut action calls the auth logout method which clears user data, deletes tokens from localStorage and sets loggedIn to false. Routes like /my-reports and report-incident should not be visible to guests but at this point in our app, that is not the case. Nuxt does not have a navigation guard that can protect your routes, but it has is the auth middleware. It gives you the freedom to create your own middleware so you can configure it to work the way you want. It can be set in two ways:
Per route.
Globally for the whole app in your nuxt.config.js file.
router: { middleware: ['auth'] }
This auth middleware works with your auth instance so you do not need to create an auth.js file in your middleware folder. Let us now add this middleware to our my-reports.vue and report-incident.vue files. Add the following lines of code to the script section of each file.
middleware: 'auth'
Now, our application would check if the user trying to access these routes has an auth.loggedIn value of true. It’ll redirect them to the login page using our redirect option in our auth config file — if you’re not logged in and you try to visit either /my-report or report-incident, you would be redirected to /login. If you go to /report-incidents, this is what you should see.
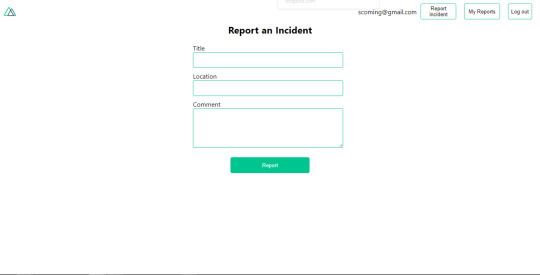
Report incident page. (Large preview)
This page is for adding incidents but that right now the form does not send incident to our server because we are not making the call to the server when the user attempts to submit the form. To solve this, we will add a reportIncident method which will be called when the user clicks on Report. We’ll have this in the script section of the component. This method will send the form data to the server. Update your report-incident.vue file with the following:
<template> <section class="report"> <h1 class="report__heading">Report an Incident</h1> <form class="report__form"> <div class="input__container"> <label for="title" class="input__label">Title</label> <input type="text" name="title" id="title" v-model="incident.title" class="input__field" required /> </div> <div class="input__container"> <label for="location" class="input__label">Location</label> <input type="text" name="location" id="location" v-model="incident.location" required class="input__field" /> </div> <div class="input__container"> <label for="comment" class="input__label">Comment</label> <textarea name="comment" id="comment" v-model="incident.comment" class="input__area" cols="30" rows="10" required ></textarea> </div> <input type="submit" value="Report" class="input__button" @click.prevent="reportIncident" /> <p class="loading__indicator" v-if="loading">Please wait....</p> </form> </section> </template> <script> export default { name: "report-incident", middleware: "auth", data() { return { loading: false, incident: { type: "red-flag", title: "", location: "", comment: "" } }; }, methods: { async reportIncident() { let data = this.incident; let formData = new FormData(); formData.append("title", data.title); formData.append("type", data.type); formData.append("location", data.location); formData.append("comment", data.comment); this.loading = true; try { let res = await this.$store.dispatch("reportIncident", formData); this.$notify({ group: "success", title: "Success", text: "Incident reported successfully!" }); this.loading = false; this.$router.push("/my-reports"); } catch (error) { this.loading = false; this.$notify({ group: "error", title: "Error!", text: error.response ? error.response.data.error : "Sorry an error occured, check your internet" }); } } } }; </script> <style> </style>
Here, we have a form with input fields for title, location, and comment with two-way data binding using v-model. We also have a submit button with a click event. In the script section, we have a reportIncident method that collects all the information provided in the form and is sent to our server using FormData because the API is designed to also accept images and videos. This formData is attached to a Vuex action using the dispatch method, if the request is successful, you get redirected to /my-reports with a notification informing you that this request was successful otherwise, you would be notified of an error with the error message. At this point, we don’t have reportIncident action in our store yet so in your browser console, you would see an error if you try to click submit on this page.

Vuex error message. (Large preview)
To fix this, add the reportIncident action your index.js file.
export const actions = { // ... async reportIncident({}, data) { let res = await this.$axios.post('/incident/create', data) return res; } }
Here, we have a reportIncident function that takes in an empty context object and the data we’re sending from our form. This data is then attached to a post request that creates an incident and returns back to our report-incident.vue file. At this point, you should be able to add a report using the form after which you would be redirected to /my-reports page.
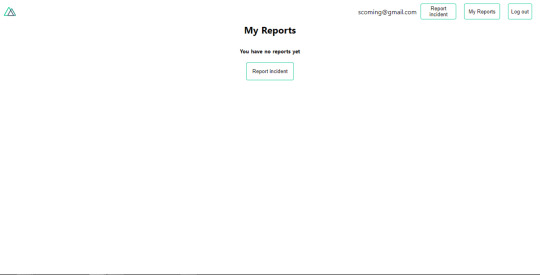
My reports page empty. (Large preview)
This page should display a list of incidents created by the user but right now it only shows what we see above, let’s go ahead to fix that. We’re going to be using the fetch method we learned about to get this list. Update your my-reports.vue file with the following:
<script> import incidentCard from "@/components/incidentCard.vue"; export default { middleware: "auth", name: "my-reports", data() { return { incidents: [] }; }, components: { incidentCard }, async fetch() { let { data } = await this.$axios.get("/user/incidents"); this.incidents = data.data; } }; </script>
Here, we use fetch method to get user-specific incidents and assign the response to our incidents array. If you refresh your page after adding an incident, you should see something like this.
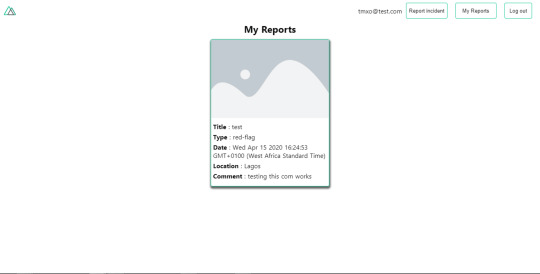
My Reports page with a report. (Large preview)
At this point, we would notice a difference in how fetch method and asyncData loads our data.
Conclusion
So far, we have learned about the Axios module and all of its features. We have also learned more about asyncData, and how we can fetch both of them together despite their differences. We’ve also learned how to perform authentication in our application using the auth module and how to use the auth middleware to protect our routes. Here are some useful resources that talk more about all we’ve covered.
Getting started with meta tags in Nuxjs.
Using the dotenv module in Nuxt.
Using Fetch in your Nuxt app.
Getting started with asyncData.
0 notes